![logo.png]](https://kb.prologicfirst.online/hs-fs/hubfs/Imported%20sitepage%20images/logo.png?height=40&name=logo.png)
The Table Layout Setup feature allows users to configure dining tables for each outlet by organizing them into restaurant sections (for example, Main Hall, Terrace, VIP, or Family Area). This setup ensures that tables are displayed correctly in the POS and can be managed according to their respective sections. While our system cannot setup as per the exact position, the numbering can be done and ordered accordingly to show section wise vacant and occupied tables.
Prerequisites:
- WebTouche Link
- Administrative Configurations Login
- Configurations Access to Restaurant Sections and Outlet Tables
- Tablet Layout enabled in screen
- Outlet(s) active and configured in the POS
- Outlet(s) table details section wise as per restaurant
Step 1: Create Restaurant Sections
- Open the POS Touche Master/WebTouche>Configurations.
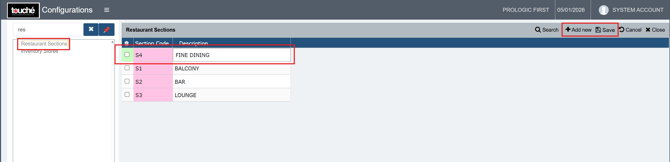
- Navigate to Restaurant Sections.
- Click Add New to create a new section.
- Enter the required section details.
- Section Name
- Any other required fields
- Save the section. Repeat the process until all required sections have been created for the outlet
Step 2: Configure Outlet Tables
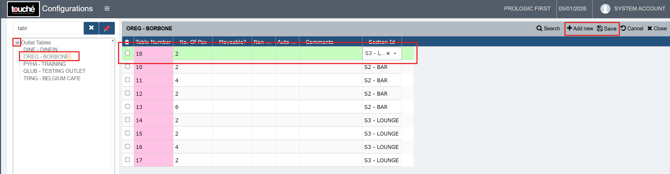
- Navigate to Outlet Tables.
- Select the '+' and then the required outlet.
- Click on Add New
- Choose the appropriate restaurant Section Id created in the previous step.
- Enter the Table numbers and No. of Pax allotted to it that belong to the selected section.
- Save the configuration.
- Repeat the process for every section within the outlet.
- Repeat the same steps for additional outlets as required.
Once done, you can verify in the POS by selecting the Outlet and then selecting Table Layout
If you are using hybrid/CAP setup, please wait till next day morning for the menu to reflect in POS. To make it immediate, run the MasterSync in server or contact POS support line